Saturday 20 November 2010

Another New project - Triumph Spitfire Race Car

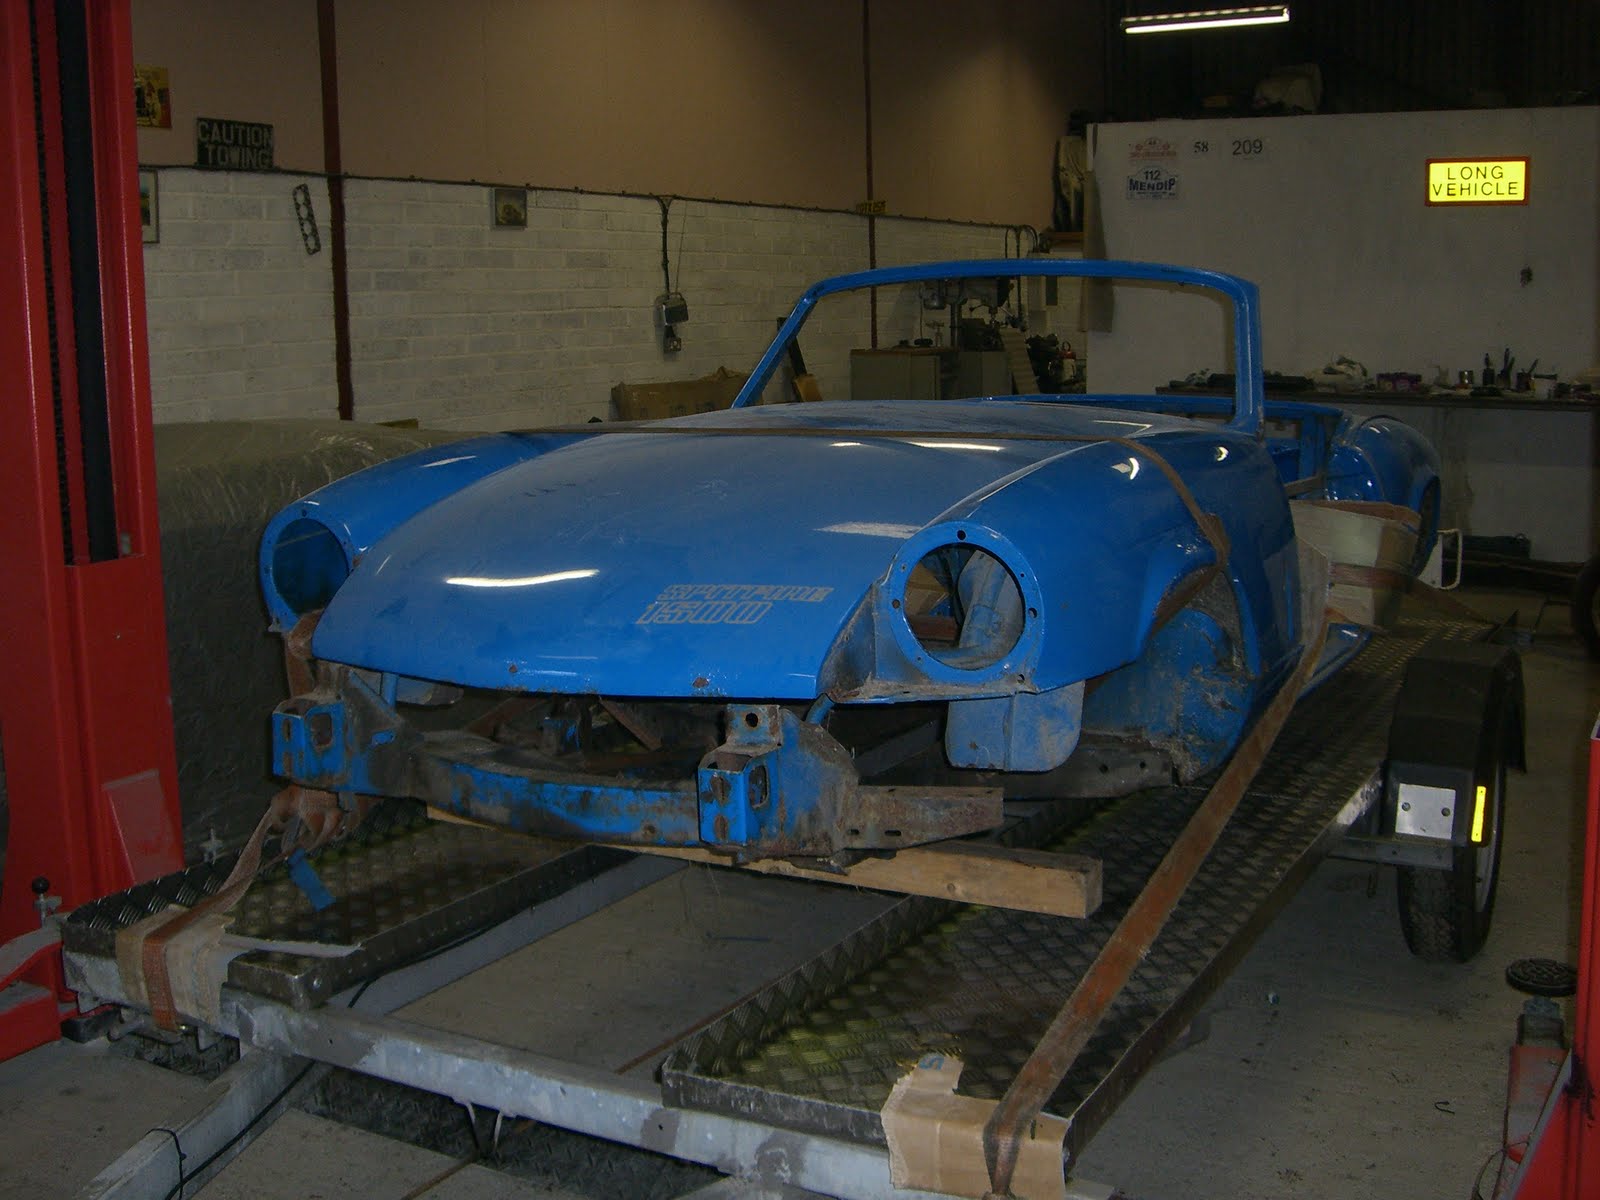
This 1979 Spitfire 1500 has been with the same owner for many years, being used regularly and living outside. Despite past restoration work, it has deteriorated and needs some serious repairs. Now that the car has a nice double garage to live in, the owner decided now is the time to get it restored, but not quite as it left the factory.
The car is going to receive full top to bottom restoration, but it's going to be built for a new life, as a road legal sprint and hillclimb car.
As well as all the normal restoration work, the car will be fitted with a full roll cage, tuned engine and modified suspension, and will be stripped out as light as sensibly possible while still keeping it usable.
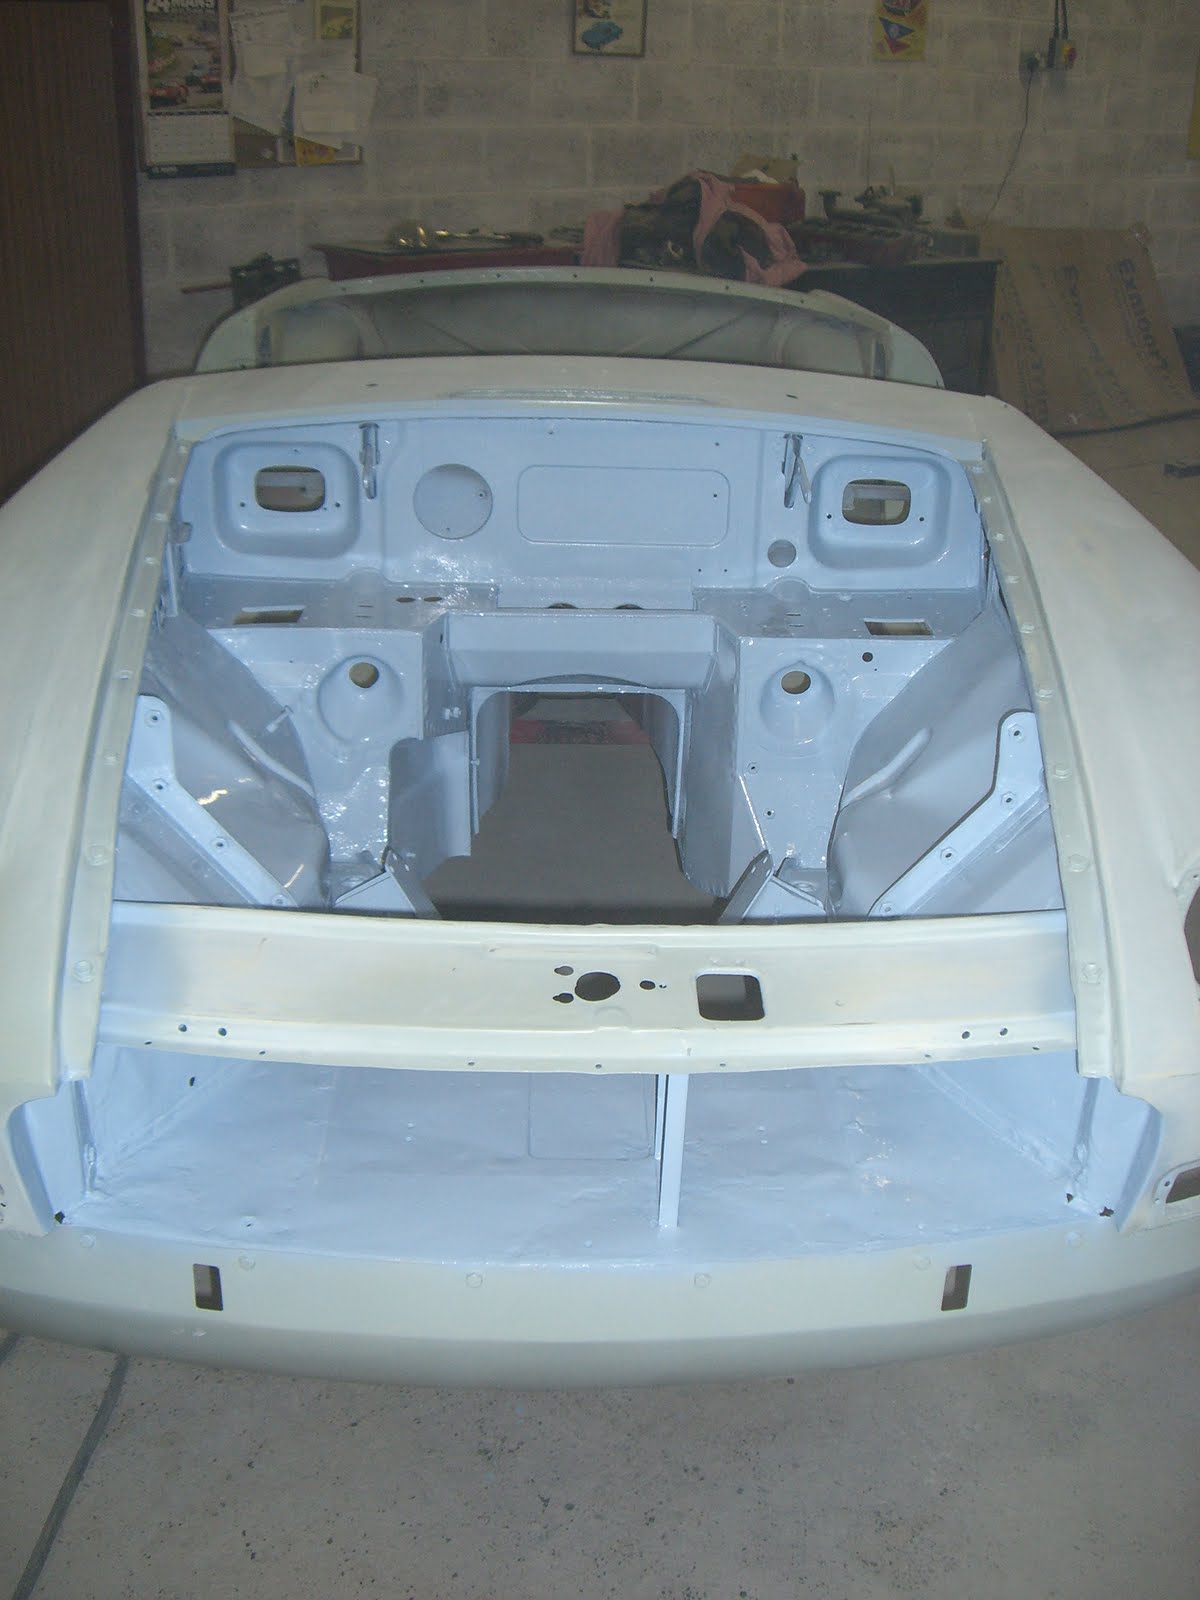
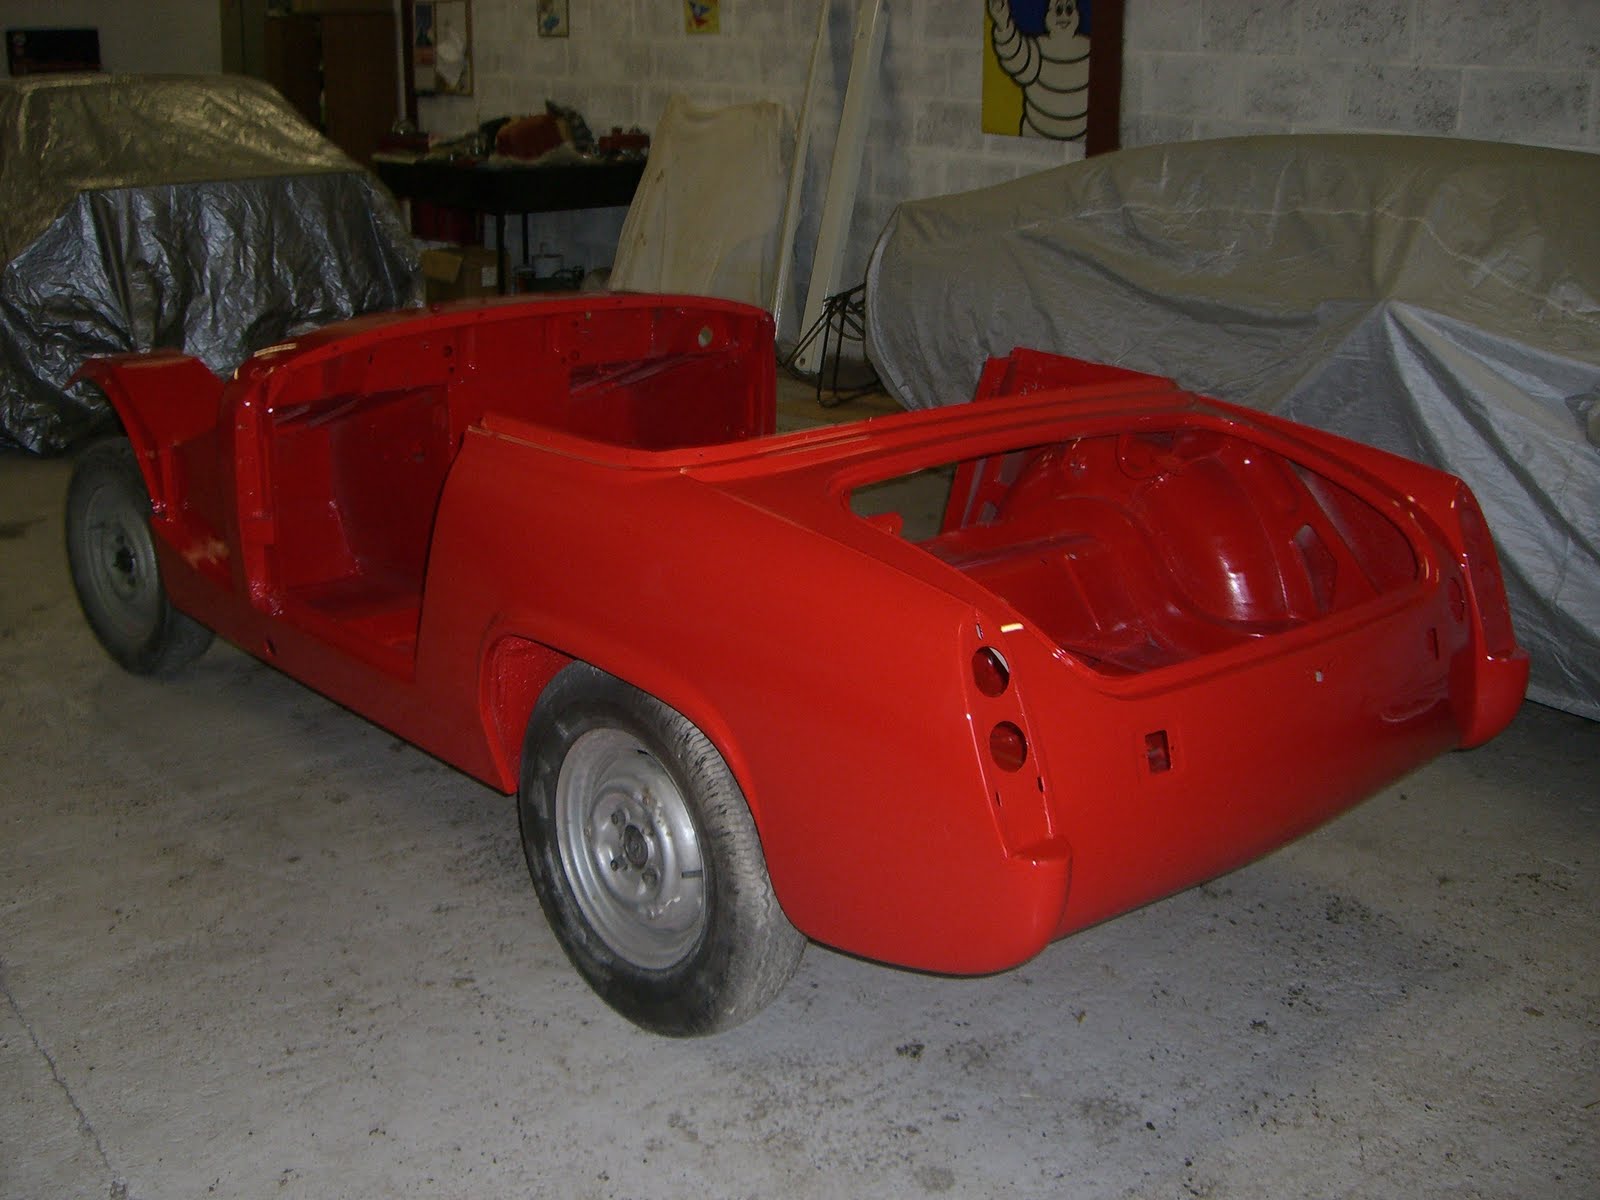
On getting the car to the workshop, it was stripped down to the bare body and chassis, and was taken for sand blasting. The car is now blasted and primed. More pictures to follow soon. It's going to be a busy winter!

New project - 1972 Audi 100S Coupe


Well, this is the new project I'd previously pictured, and well done to those of you who correctly guessed what is was! The Audi 100S coupe is a very rare beast in this country, with only around 20 being registered with the DVLA. Produced from 1969 to 1976, not many of them sold in this country, which is a great shame, as their stylish lines and lively performance makes for an unusual and competent choice of classic.

The car and all the panels have now been sand blasted and etch primed, to reveal all the true horrors that lurked beneath the filler.....
As I write this, large steps have allready been made into repairing the shell. Some pictures will be posted shortly.

Tuesday 21 September 2010

1965 MGB Roadster: Feeling (Iris) Blue

The MGB is now painted and looking rather nice back in its original factory colour. The car was painted in a very durable 2k etch primer after it was sand blasted, and during the prep recieved 4 more coats of 2k primer (flatted between coats). Once everything was ready, the body recieved 4 coats of 2k top coat. The wheel arches have been coated with a high quality wax-rich stone chip, the next job will be to get the shell up on the lift, and coat the rest of the underside.

Sunday 5 September 2010

New mystery project - can you tell what it is yet?

A new restoration project has recently arrived, the owner had been looking for an example of this car for a while, and finally found this one. It was complete, and in reasonable order, but someone had started to 'restore' it with lashings of filler, grey paint, and the kind of welding you could probably produce with a nine volt battery and an old coat hanger.
The first stage, as always, is to strip the car right down for sand blasting.
For now, Im going to leave you all guessing what the car is, and no, it isn't an Aston Martin!

1965 MGB roadster - The restoration continues

Although I've not mentioned it in a while, work on the '65 roadster has been slowly progressing in the background. All the welding work has been completed - the n/s rear wing was replaced, along with the complete inner and outer wheel arch, the rear panel and valance were replaced, as were the boot corner panels. After a few small repairs to other areas, the car was removed from the roll-over jig, and it was time to start making sure everything lined up.
The car is now prepped and nearly ready for top coat. The doors have been checked and adjusted for fit, the wings are fitted, as is a new front valance. Any edges and areas on these panels that are hidden, were painted before fitting, to make sure no areas were left in primer.
The engine bay and boot are painted first, and will be masked off when the outer is painted, to prevent over spray. As you can see, the car is being painted in Iris blue - the colour it left the factory. Before long the car should be this colour all over, and ready for rebuilding.

Series one Land Rover: Finished

By the end of July the Land Rover was all ready for its MOT, which it passed without any troubles.
The final touch to the restoration was the adding of a roof. The vehicle had previously been fitted with a hard top, so rather than spending ages finding all correct soft-top bits second hand, everything was purchased new from Exmoor trim - a well known company for all things Land Rover trim related.
Not only did they supply a new hood, but new hood sticks and window channels and all the fittings. The hoods are made to the original Land Rover patterns, so look just right, and really finished off the restoration.
The vehicle is now back with its owner, being enjoyed attending shows and going off camping, another job done!


Saturday 10 July 2010

Series One Land rover

The 1955 Series One Land rover has come a long way since I last mentioned it. The bulkhead has had the top rail section replaced with a new section fabricated 'in house' and various repairs have been made to the footwells. The chassis has had repairs to the bumper irons, outriggers and more drastically, a complete rear 1/4 chassis! As the rear crossmember was a bit 'ripe' and the spring hangers had been heavily plated, it was the easiest route to a smart repair.

The chassis, fuel tank and axles were all thoroughly cleaned, painted in an anti rust primer and then given a few coats of black enamel. The front springs were replaced with new items along with various bushes and bolts, and things like steering, pedals and prop-shafts have all been greased. Also, the brake pipes (including flexi peipes) and wheel cylinders have been renewed.
The old mix of worn out tyres have been replaced with a brand new set of suitably nobbly 6.00x16 crossplys. Supplied by the good folks at Longstone Tyres (a good source of old style crossplys for all kinds of vehicles) they look the part, and wernt any more expensive than cheap radial remoulds.
It was then time to get on with the bodywork. As mentioned before, the owner stated that he wanted the vehicle to be tidy and usable, and concious of cost, the bodywork was given a quick prep down, with the wrost of the dents and old body filler being rectified.
The vehicle is now looking much better in its original 'mid bronze' green colour.
The wiring has been replaced with a nice new loom from Autosparks and everything is now connected back up and working. Due to the fact that the originals were broken or missing the side lights and indicators have been replaced with brand new series 2/3 land rover items.
Within the next few days the vehicle should be back up and running, driving, and ready for its first MOT in a good few years!

Latest worshop news

Its been a while since I last posted an update, so heres a quick catch up of whats been going on.
Firstly, the 1968 MG Midget restoration is finished, and is now on the road and back living with its owner, being enjoyed in the summer weather. Ill let the pictures do the talking, the final results were very pleasing, especially considering the cars original state.


As always there has been plenty of other cars in the workshop for smaller jobs, such as Servicing, MOT work and other repairs. Ive added the next few pictures just to show some of the cars that have visited recently.


Monday 10 May 2010

Series one Land Rover SWB

Just incase people reading this blog were getting fed up with reading about MGs, I thought Id better ad some pictures of other projects. This Series one Land rover arived recently, for a sympathetic restoration. Due to the meccano like nature of the vehicle, I had the bodywork removed before I remembered to take any pictures of how it looked when it arrived!
The Vehicle has been sat for a number of years, and the owner wants it usuable and presentable again, without it being overly restored.
It needs various welding to the bulkhead and chassis, the wiring needs replacing, and things like the brakes and suspension will need some attention. Once all the mechanicals are done, the plan is to paint the chassis and running gear, and then refitt the bodywork, and repaint the vehicle in its original bronze green colour.

Saturday 1 May 2010

Midget sprint and hillclimb car

News on my own Midget, the 1380 engine is now finished and fitted along with the new straight cut close ratio gearbox. This was all done within plenty of time for its rolling road appointment, more precisely, a week before... This meant spending several hours every evening driving the car up and down main roads at 3000rpm, trying to rack up 500+ miles to run everything in!
Luckily, I managed to do about 600 miles before it was due to be on the rollers, and the night before, I changed the running in oil and filter, and checked all the tappet clearances to make sure all was well.
As always, a rolling road session proved invaluable with a modified engine.
Encouragingly, going up several sizes on the chokes and main jets kept yielding more power, and a drop in air corrector size, and increase on the pump jets had everything running perfectly.

I use Interpro in Thornbury for my rolling road work. Dave Grithiths, the operator, is very knowledgeable, and their rolling road also measures the transmission loss - meaning some very accurate flywheel horse power figures can be calculated.
The final results? 107bhp at the flywheel (78 at the wheels) and 95lbsft of tourqe.
I'm extremely pleased with these figures, as the cylinder head is 100% my own work as is the assembly, and everything apart from the actual boring and grinding. Dave commented on how tractable the engine was, despite the very light bottom end, and fairly wild camshaft.
Since the rolling road, I've managed to put about 850 miles on the engine, of reasonably relaxed driving, and before the first sprint, I'll change the oil and filter again, this time using some high quality racing oil.

1968 MG midget build

The building of the 68 midget is well under way, with all the running gear, pipes, wiring, and fiddly bits now fitted. The 1330 engine is now finished and fitted, and before people email me to complain it's the wrong colour (you never know..) the customer wanted a red engine to match the car, so red it is!
The car is sat on new minilite wheels, and virtually all the components are are new or rebuilt, and even the new components have been treated to a good coat of paint.
Actually, since this picture was taken, more bits have been fitted back on, and it shouldnt be long before it's looking like a finished car.

Sunday 28 March 2010

1968 MG midget - let the build begin


Recently there has been some action with the 1968 MG midget I restored last year (see the photo gallery on the main website). After I’d done all the metal work on the car, the owner took it away, as before he brought it to me, he already had a friend who he wanted to paint it (as his friend is a painter by trade).
The other day the owner called me to tell me the car was painted and that he would like me to collect it and start rebuilding it as soon as I could.

So the car is now back in the workshop, looking very nice, and ready for reassembly. Once I've finished rebuilding the engine (see 1330 engine build post) I'll start building the car back up in between other work.

Thursday 25 March 2010

MG midget Sprint and hillclimb car - winter rebuild

On a slightly less work related note, my own Midget is having a bit of a winter re-work (ok, its spring now!) The car was previously running a fairly well modded 1115cc engine (bored 1098) with formula junior valves, 40DCOE etc, putting out a healthy 86bhp. However, my class allows me to go up to 1400CC, so a new engine is currently under construction.
The 'new' engine is a 1380cc (73.5mm powermax pistons), and amongst other bits has got: wedged crank, lightened rods, super light flywheel, rimflow valves and lots of other nice bits. Although id be happy with anything over 90Bhp, it would be nice to break the 100 mark, which should be possible with the parts im using. I'll find out in april, as its booked in on the rolling road.
The car when i built it, started out as a mildy modified road car, but the more I've sprinted it, the more I've changed it.
Along with the 'new' engine Ive also built up a straight cut close ratio gearbox ready to fit, plus I'll be fitting a lower final drive.
Unfortunately, I can no longer use the excuse of having a smaller capacity engine than anyone else (!)

1968 MG midget - 1330 Engine build

Currently being built up is the engine for the 1968 MG midget (pictured in the photo gallery) On stripping the engine, it was found to be in pretty poor health, with a broken piston ring, worn crank and all the usual wear and tear.
Due to the fact the engine was already +40 the decision was taken to bore it to 60 thou, giving a useful 1330cc. Aswell as being reground, the crank and all the bottom end has been balanced, and the flywheel has been lightened, to make a sweet and lively engine. All rod, head and bottom end fixings have been replaced with high tensile items for reliability, and the center main bearing will be machined and strapped.

The cylinder head has been modified, with race quality 35.6mm inlet valves and 29.5mm exhaust. The head has been thoroughly re-worked with lots of attention to the ports and combustion chambers. The engine is also recieving: new high lift camshaft, followers, progressive valve springs, light weight timing chain set, high flow oil pump, and modified cooper S distributor.

All cylinder head work is done 'in house' as is all the engine building, with only certain machining being 'farmed out'. By being able to give the machinist the bare components, ready to be machined and knowing exactly what I want doing, I am able to build good quality engines, at a very reasonable cost to the customer.

Once this engine is built up, and fitted with the correct induction and exhaust components, it should hopefully produce 90+bhp. More importantly, it should be very tractable, and a very strong and usable road engine.

Saturday 6 March 2010

More work on the 65 MGB roadster


The right hand floor pan is now replaced, as is this half of the cross member. This side of the vehicle actually proved to be a little easier, despite a few ugly patches, all the of the old floor and grot came out with minimal (ok about a half a day!) of grinding and un-picking. The hoop of metal around the jacking point tube was a bit grotty this side, so it was ground off and a new piece was made up before the jacking point was welded back in place on the new cross member.


There was also a bit of work to be done around the spring hanger, as it had been partly plated over and was all of a mess. after cutting out the plated and rusty areas, half the stiffener plate was re made, to keep everything looking original.

Monday 15 February 2010

1965 MGB Roadster Restoration


I recently did some more work on the 1965 'pull handle' MGB roadster undergoing restoration in the workshop. Both floor pans were rather patched and horrible, so I started by removing the left hand one. This was no easy task, as it has been patched in places, and where someone had once fitted new sills , it was brazed along the entire outer edge. Rather than half an hour drilling out spot welds, it became hours of grinding back ancient blobs of brass until the edges were back to good clean steel, ready for the new floor.


Once the new pan was trimmed, adjusted to fit, and welded in place, half of the centre cross member was cut out and replaced. The cross member didn't look too bad externally, but with the old floor pan removed, it wasn't a pretty sight inside, so I decided the best idea was to cut it out and replace it. Rather than chop the whole thing out in one go, which could leave the car a bit flexible, I decided to do it one half at a time to minimize shell movement. I will replace the other half when I replace the right hand floor pan - an internal stiffener will be welded inside the centre join of the new cross member to compensate.
To finish off it was just a case of welding the jacking point back on (which id carefully cut from the old cross member) and a quick coat of primer to stop the welds rusting.

Now I just have to do the same the other side, only it looks like that sides had even more brazing....

Monday 8 February 2010

Austin A40 engine rebuild


In the workshop recently:

The owner of this Austin A40 Somerset has become a regular customer.

Before I started looking after the car, it suffered from regular head gasket failure - a problem the Somerset and Devon 1200cc engines are prone to. When the gasket failed recently, the decision was taken to properly rectify the problem.

The engine was pulled and stripped, and the head and block were skimmed showing both faces to be uneven. A few mods were made to the way the studs located the head, the core plugs removed and the cooling system thoroughly cleaned (there was ½ an inch of rust/sludge in places!).

The engine was checked while it was apart and found to be in very good condition. The valves were lapped in and new valve springs, chain tensioner and water pump were fitted. Everything was cleaned to remove many years worth of grime before re-assembly with new gaskets and core plugs. All the head fixings were carefully checked and cleaned, and the head very carefully torqued in gradual stages. To finish things off, the engine was given a coat of Austin engine green.


Today the engine went back into the car and everything was fitted up and re-connected. Tomorrow should see it running and finished, lets hope the problem is sorted once and for all!